Sunday,
February 5, 2017
2:14
PM
Hey y'all!
I'm starting a
little project and decided to start a blog to document everything and maybe
give some others out there ideas. I'll
go ahead and put it out there that I have intentions of posting before &
after photos to Pinterest for others and would appreciate it if you did,
too. Please also feel free to share this
post and future posts. Some of your friends might have awesome ideas I can
incorporate!
A little background:
The Doctor and I
bought a house a few years ago and have been slowly redoing rooms to match our
lifestyle and taste. I'll have to show
you pictures of the Master Bathroom sometime.
It's gorgeous. The Doctor did a
fantastic job. One of my longtime wishes
has been to have my own sewing and crafting space that is magazine/Pinterest
worthy. While we do have two spare
bedrooms, I've decided to turn one of the closets into my sewing/crafty space
for several reasons, two of which are:
- It's nice to be able to have two spare bedrooms when family and friends come to visit.
- The Doctor often works from home and it would be nice to have an office space that isn't the dining room table. (The room with the closet that I’m converting is going to end up being an office/guestroom/crafting space.)
I'm super excited
about it because I plan on doing all (or almost all) of it myself. The Doctor
is super handy and talented and amazing in so many ways, but I want to do this
myself. Because I may be a bit of a cupcake. Or a princess. Ya' know, whatevs. I will definitely consult with The Doctor
along the way because I have no idea what I'm doing as far as the
technicalities go. I mean, I know what a
stud is and I know the workspace table will need to be anchored to said studs,
but I'm not sure what kind of brackets/bracing would be best. That kind of stuff. But I do have the layout mostly worked out in
my little head and, y'all, it's going to be awesome. Workspace spanning the
width of the closet with a drop-leaf extension to expand the work area, rolling
storage carts for my fabric, framed peg board, shelves, and some other things.
It's going to be epic.
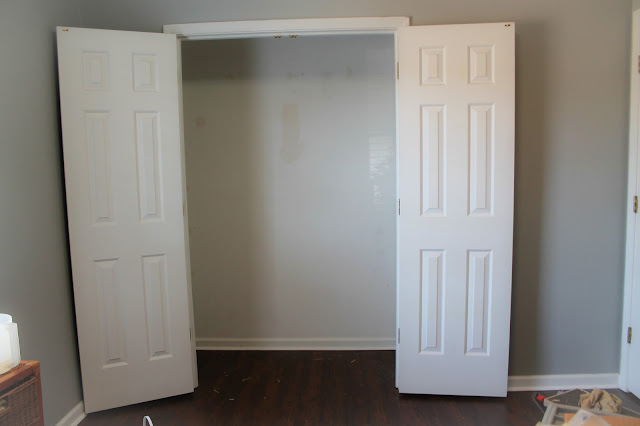
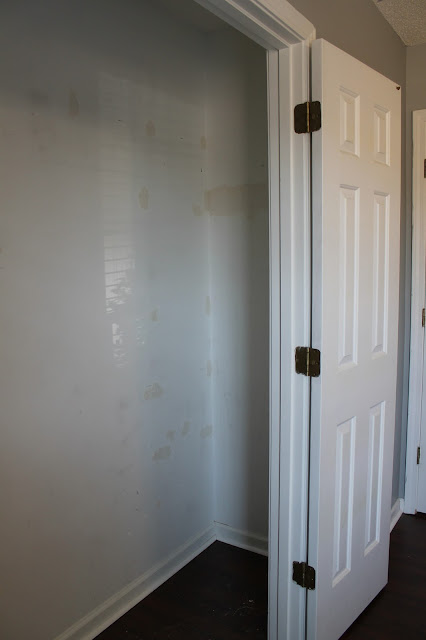
Here are a few
pictures of what I'll be working with. It's a two-door closet, which is great
for creating a wide workspace. The doors will be repainted white and the 1980's
gold knobs will be replaced with rubbed bronze knobs.
Look at all of that
space!! The opening is about 4-ft wide. I plan on maximizing the storage and
using the backs of the doors for something, but I haven't decided what just
yet. Some things you have to figure out
when you get there because an idea or two leading up to that moment may not pan
out like you think it will, ya know? I'm going to frame out a piece of peg
board and put it in the center of the space. I would love to figure out how to
cover it in fabric or paper and still be functional. I don't normally like florals, but it might
be a nice accent.
The closets extend
about 20" beyond the opening on each side. I have two rolling storage
carts that will hold the bulk of my fabric. They fit oh-so-perfectly in the
little cubbies that will be created. I'll have to show you a picture of the
drawers. I've made little bolts of fabric and organized almost all of it. It's
adorable. (Isn't my spackling pretty?
There were a lot of areas that needed to be patched.)
I'm thinking the
area under the table will be left open to store bulky items. There will be a series of shelves on each
side of the closet above the table. I'll
store some of the smaller items, like cones of serger or embroidery thread,
vinyl, etc. on those. I haven't figured
out if I'm going to do a shelf that runs the length of the closet at the very
top for items that I never use but don't want to get rid of. Probably. But we'll see.
So that's it! I hope you'll follow along with me in my
weekly posts.
Toots, y'all.


Comments
Post a Comment